
(With thanks to The Pastel Journal, where this chapter was originally published, with additional material included here.)

The Edge, 18x24"
For decades, many an art student has been told that painting a sunset is a waste of time and talent, overused, hackneyed and stale, an exercise in the unimaginative. Yet who has not wished, at least secretly, to paint the fiery sunset over the plains or the delicate colors of a summer sunrise, inspired by its natural beauty? Artists want to share that momentary experience, to paint the exhilarating colors, yet this subject is relegated to the child who is considered too unsophisticated to know it is merely a “formula” painting.
How can we redeem a subject that has been so thoroughly rejected by jurors, professors and art critics? Perhaps we must come at it with more than the eyes of the child, ready to paint the breathtaking splendor of a new day or the glory of its finale. To meet the challenge of making a painting that is not simply a trite recipe or a reiteration of what has already been done, takes a little thought and planning, and the willingness to respond to what is there and take a few chances as you paint.
Paramount to painting a sunset sky that is not commonplace or overly romantic is the need for careful composition. Design your painting so that it has a center of interest, a reason for existing beyond being another beautiful sunset. The colors may have been spectacular, but ask yourself what particular vision you bring to this painting beside color alone.
When was the last time you tried to paint a sunset on location as it happened? Most artists rely on a photograph to paint such a fleeting moment in time. Things change quickly at that time of day and a photograph can capture the rapidly changing sky colors and cloud patterns.
However, if the last roll of photos you took of the sunset or sunrise ended up as a lot of washed out colors with hardly any contrast, you might need to increase your skill with the camera. That said, it is best not to rely on the camera entirely.
First you must record the colors in your memory. Pay close attention as you watch the fleeting changes in the light. Remind yourself that the blue of the sky was almost green at the horizon or that the shadowed clouds were a delicate lavender color. Name the colors out loud, if you can, and resolve to remember them.
Practice seeing. Try “painting” the sky in your memory, rather than simply using the photograph as a resource. As you develop this habit, looking at the photograph will increase your ability to recall the colors you actually saw while there.
You might also make some rapid line illustrations with notes on what you observe. Quickly draw out the patterns and jot things down, perhaps recording the color of the sky at the horizon and over the tops of the clouds, or the progression of colors as they move upward from the horizon. Note the color of the clouds where the sun shines through at the last moment, perhaps bright orange, salmon pink, magenta or gold. List the layers of colors you might put down, such as deep yellow gold, medium yellow orange and pale orange, to describe how you might approach painting that color. This line drawing is only to remind you of what you saw and may not mean anything to anyone else. Develop your own shorthand for what you see and use it to aid your memory.
As difficult as it might be to set up and be ready to paint on location before the sun rises or sets, color sketches made as it happens can help you see and remember details more precisely. Ask a companion to photograph the sky as you make your rapid color sketches on location so that you have line drawings, color sketches and photographs to refer to when you are ready to paint a finished work in the studio.
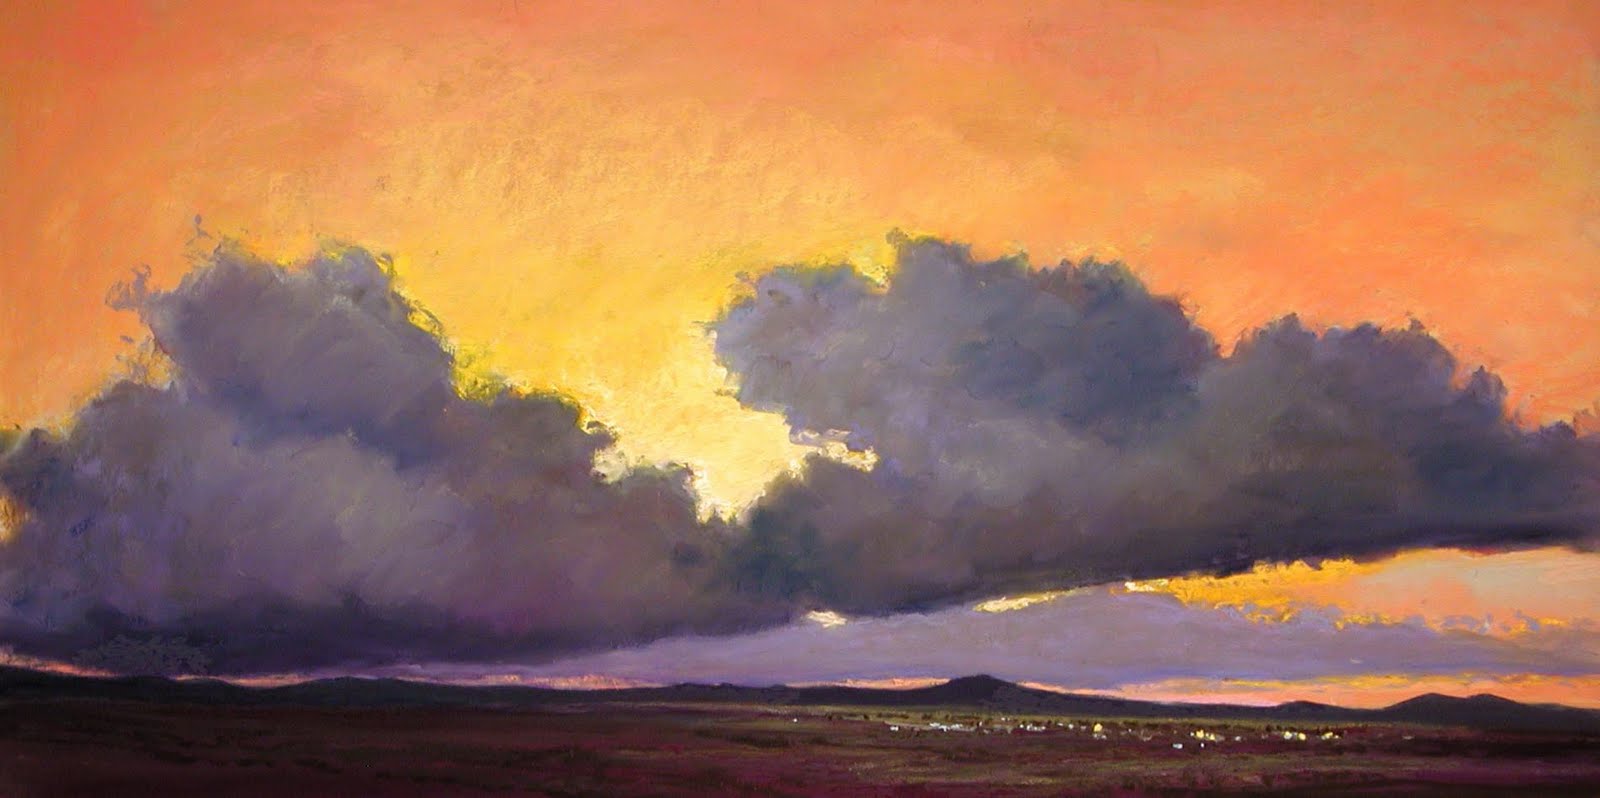
One thing significantly different about a sunset or sunrise is that the angle of the sun is below the clouds, rather than lighting them from above as in the daytime. This means that the bottoms of the clouds become light and colorful, while the tops are cast into shadow. This reverses the usual order of “warm on top, cool on the bottom” and sometimes casts shafts of shadow or rays of light into the clear sky. These can be very challenging to paint, but it may be worth the effort to develop a technique to depict them.
Molten Moment, 12" x 18”
 Remember that clouds are composed of water droplets or ice crystals that tend to bounce the light around inside them, making them glow. Even in shadow, clouds will have some light within them, showing their volume. Don’t miss the way shadows wrap around a cloud, giving a sense of shape and showing how they overlap one another.
Often you will see a “silver lining” when the cloud is almost directly between you and the sun. This brightly lit edge will usually fool the camera’s eye into over-darkening the part of the cloud obscuring the sun, but notice how in reality soft light is held inside. However dark the cloud is in shadow, there is a sense of the light inside.
Look for places where a hint of sky comes through the cloud, giving it a cool, airy quality, as if it is somewhat insubstantial. These sky holes and sheer spots make your clouds appear to float in the sky, suggesting the billows caused by the wind. Use small touches of sky to move the viewer’s eye to your center of interest.
One caution: The destination of the painting will almost always be the ball of the sun if it is just above the horizon. Like a road or other visual pathway, the convergence of color, light, contrast and detail at the apex of the setting or rising sun is an almost unavoidable visual target. If you do not want that as your center of interest, risking the label of trite or ordinary, do not include the ball of the sun itself in the image. Let it dip below the horizon instead, as you draw the eye to another focal point.
Why is the sky red at sunset? We know that sunlight contains all colors in the spectrum. The atmosphere around our earth scatters the light, usually resulting in the short-wavelength blue of daytime skies. In the evening the sunlight travels through much thicker atmosphere as the sun drops on the horizon, allowing the longer wavelengths to be scattered by dust, smoke and other small particles in the air. The result is that first blue, green and yellow light are slowly filtered out, leaving orange and red. You will see the most spectacular sunsets during times when there are dust particles in the air, such as after a volcano has erupted or when there are water droplets scattering the colors.
The colors of the sky change accordingly, depending on the amount of daylight remaining and the location in relation to the orange-red of the setting sun. Color hangs in the sky in an arc around the setting sun, yellow nearest the sun, becoming progressively more green and blue, finally blending into the dark purple of oncoming night.
Here is your chance to use some long-neglected colors -- brilliant orange or piercing magenta -- colors you love but hardly ever pick up. You may enjoy using bright, out-of-the-tube colors that have been ignored in your palette. Lather the sky with neon green and drench the clouds in luminous yellow. Be adventurous.
Mud might result, but only if you mix widely varied temperatures together too thoroughly or over mix complementary or tertiary colors. You can keep colors fresh by using strokes that remain somewhat unmixed, so that the colors and layers remain lively and vibrant.
This does not mean that you should avoid using complementary colors. Rather the opposite -- the deep blue and brilliant orange standing side by side may be what gives the scene pizzazz. It’s the contrast of fiery red and pale green, fragile yellow and rich purple that brings expression to your painting. Only be careful to retain the authority of each color, rather than over-blending them into a frowzy, run of the mill gray.
Smoldering Moment, 11" x 22"
 But there is a place for beautiful grays in your painting. Look for the way neutral colors in the clouds enhance the stunning, clear colors of the sunlight. Take care not to allow the grays to become gloomy or ordinary, which will detract from your painting. Instead, make them a subtle and interesting blend of colors in the painting, perhaps carefully layering colors to achieve a gray using a mixture of lavender, green and peach. An interesting, quiet gray can be the perfect foil for the louder colors you wish to feature.
Sunrises tend to be soft and delicate, quieter in color than a sunset. The clouds may be wispy, not yet raised up by the heat and wind of the day. Often the contrasts are muted, juxtaposing fragile, pale grays with watery pinks, yellows and blues. The sky is often a calm, agreeable blue made by layering the palest hues of turquoise and cobalt. The same spectrum of colors exists around the rising sun as those at sunset, yet they seem not to have the same fire or heat.
At sunset, when the dust of the day has scattered the light into a riot of colors, great contrasts might be seen, often incorporating deep darks where dense clouds have been formed by wind and moisture. Try using rich blues layered to create the impossible, deep green-blue-purple of a sunset sky against which colors explode.
One tool that is quite useful for manipulating clouds in pastels is called a Colour Shaper. This gadget has a rubber tip that can easily grab colors and move them around, much the way a paintbrush does. For small, delicate details, nothing beats a fresh, quick dab using the flexible tip to lift a bit of the blue of the pale sky at the horizon and place it in the midst of the dark purple clouds at the horizon, or to grab a touch of lavender-gray cloud and deposit it amid the cool, clear sky. It helps to wipe the tip on a paper towel or rag to remove colors between strokes and keep them clean.
Although the camera will almost invariably reduce the foreground to a mere blackened silhouette, do not neglect this area in your painting. The ground plane is still an integral part of the painting, even if it is darkened. It needs to be more than a black paper cutout shaped like a mountain or tree.
The setting sun often highlights the land, as well as the sky. Look for the colors of the sky cast onto the intervening landscape, as well as shadows created by the light. You can use simple shapes to make a range of darkened mountains or an intervening line of trees, using dark greens and blues, or add a blush of dark pink, deep maroon or velvety gold to a field in front of dark hills.
At sunrise the land plane is very dark before the sun actually rises over the horizon. However, though that is a dramatic moment, sunrise is not ended at that point. Spend a while studying how the land colors change from the first blush of morning to the full sun of daylight.
Take a few chances as you paint the sunrise or sunset. Often the clichéd sunset painting disappoints because the artist fails to try something new. Experiment with a different kind of paper. Try making your own surface. Paint on an outrageous color or on black paper. Turn the painting upside down and look at it as a series of shapes and colors. Reverse the colors, painting in complements first, then revert to the natural colors -- just to see if it makes your color more exciting. Paint a series of pieces from the same photograph or color sketch on several different colored backgrounds to see how the ground color affects the painting.
Have some fun. Take some risks. Try a few new things. Push yourself a little and get out of the comfortable rut that results in a formulaic painting.
Above all, compose your painting so that it is interesting and varied, not the same old approach of a flaming sky over the silhouette of a black mountain, the ball of the sun caught forever as it tops the peak. This is a stale approach to a potentially brilliant composition. Do not rely on the subject matter alone to make the painting.
Instead, make your painting technically superior. Look for a striking composition that transcends the standard “pretty picture.” There is an underlying abstraction to any painting, especially that of an early morning or late day sky. This is a time when things flow and change rapidly, allowing you to choose those parts that will enhance your composition. Judge the negative and positive shapes, analyze the contrast of colors and values, the juxtaposition of brilliant colors with grays, the movement of the eye through the elements, the contrasting textures of the land and the sky.

Morning Glow, 12" x 18"
Thank you for making this point! It might take something of incredible virtuosity to overcome jurors and galleries' objections to the subject, but I also remember seeing some incredible sunsets and sunrises out in Jackson Square among the street painters. Every one of them was different.
ReplyDeleteSome were a bit formulaic, but far more often I saw the good painters hang a dozen different "dawn in the bayou" paintings with their egrets and/or alligators... and every one of them unique, every one of them brimming with light and color that came from a different season, a different place, a different time during the morning.
For a street painter, doing sunsets and dawns in the local scenery is something that will always grab the tourists. But doing it in a formulaic way quickly bores even the most prolific street artist -- especially the most prolific ones. So they'd turn to variations, to direct observation, to playing with the more interesting mornings and evenings they've seen rather than just doing the same red-orange sky with black silhouettes.
Yours are absolutely stunning and unique. Very different from the sunrises and sunsets I saw in Colorado or New York or even here in Arkansas. At the same time of day when the camera turns everything to a black silhouette, there's often instead a rich deep blue like an ultramarine monochrome of everything in shadow, or a rich blue-violet monochrome that goes up to mid-values. That bluing always fascinated me too, that stage of the day when you have value and have lost all but one of the colors.
Thank you so much for this chapter!
Thank you for this chapter, it is a must read - for me, several times over as I learn to paint sunsets and sunrises. You are pushing us to analyze what's in front of us when looking at skies. I know that the information contained herein is going to help me further my paintings.
ReplyDeleteI have actually seen bright cherry red to light yellow sunrises out in the MS. delta. Is that because the horizon is very flat to start with? Not quite sure. I used to go outside when working the night shift just to see the sunrise. (My break time was typically correspondent with the sunrise time!) Blue was usually the last color to reappear at the horizon after the pinks, cherry reds, oranges and yellows. Out in the delta, one can feel that they are in the middle of a sunrise if there are no buildings or trees around for reference. It's really quite incredible! So.... my question is: Do you paint what's there or (what you can remember in my case) or paint the oranges and pinks and you see them? And when you have a bank of clouds that starts near, but not on, the horizon line and extends past the viewers' line of sight, with variations of the oranges blending with each little bump (hundreds in the one big cloud) that are pretty much the same hues? It was a beautiful sunrise, but the only thing I can compare it to was a sunrise colored bubble wrap with the bubbles all touching!
ReplyDeleteThanks so much for this chapter. It's as though you searched my mind and hit on most all of the questions I've had!
ps: Your sunsets are incredibly beautiful. It makes me want to step into the paintings and just look at the colors!!!
ReplyDeleteThank you for sharing! This is always such a contention with me...I lock myself into a box, and don't let myself be adventurous. I'll definitely be spending time getting my "feet eet' you've def inspired me!
ReplyDelete